The mane was a brown fur texture i found in google images. I did not save the picture and was unable to find it again once i had finished making this. I used the clone tool to cover the entire area of the mane.
 The white fur is the same fur as the white fur in the fox. and i used this on the feet and belly of the lion.
 Using photoshop i imported the renders of the UVW map and used the clone tool to cover the area with the fur.
 Using the original fox fur texture i used photoshop to re colour it to a yellow lion like fur colour.
To start the lion off i found a simple vector cartoon graphic, and started to create the face around the eye.
 I did this until i had covered the top half of the face.
 Once i had the basic top half of the face made, i moved the edges out to make the face 3D.
 Once the top half was made and put into shape, i dragged down the mouth and shaped it.
 After the face was shaped, i started to create the polygon around the sides of the head.
 From the side of the head the ears where extruded out. The inner ear was made by using an inset and moving the inset into the ear.
 With the head completed, it was time to work on the neck. I used images from google images to compare, to get the proportions of the neck to the head right.
 I did the same thing for the back as i did for the neck i used images on-line to compare the length of the back.
 I decided to use an image of a well know lion king character for the size, and i matched the bady to that of the image.
 I used the top view and gave the back some shape using the scale tool.
 I extruded the top of the leg out of the body, and extrude it down the leg on the image. I used the image to shape the leg by scaling it in.
 I finished of my extruding down for the feet, and extruded out the toes.
 This is an over view of the lions body so far.
 I used the same technique as i did with the back of the body. I created the tail and followed the tail on the graphic.
 I prepared the back legs my making a surface to match the thigh of the image, and extruded the image out.
 After the thigh was made and shaped, the back leg was extruded down and the vertex's moved to the shape of the leg on the image.
 This is the lions body before the mane was extruded.
 The mane for the lion was the extrude from the head and back of the lion.
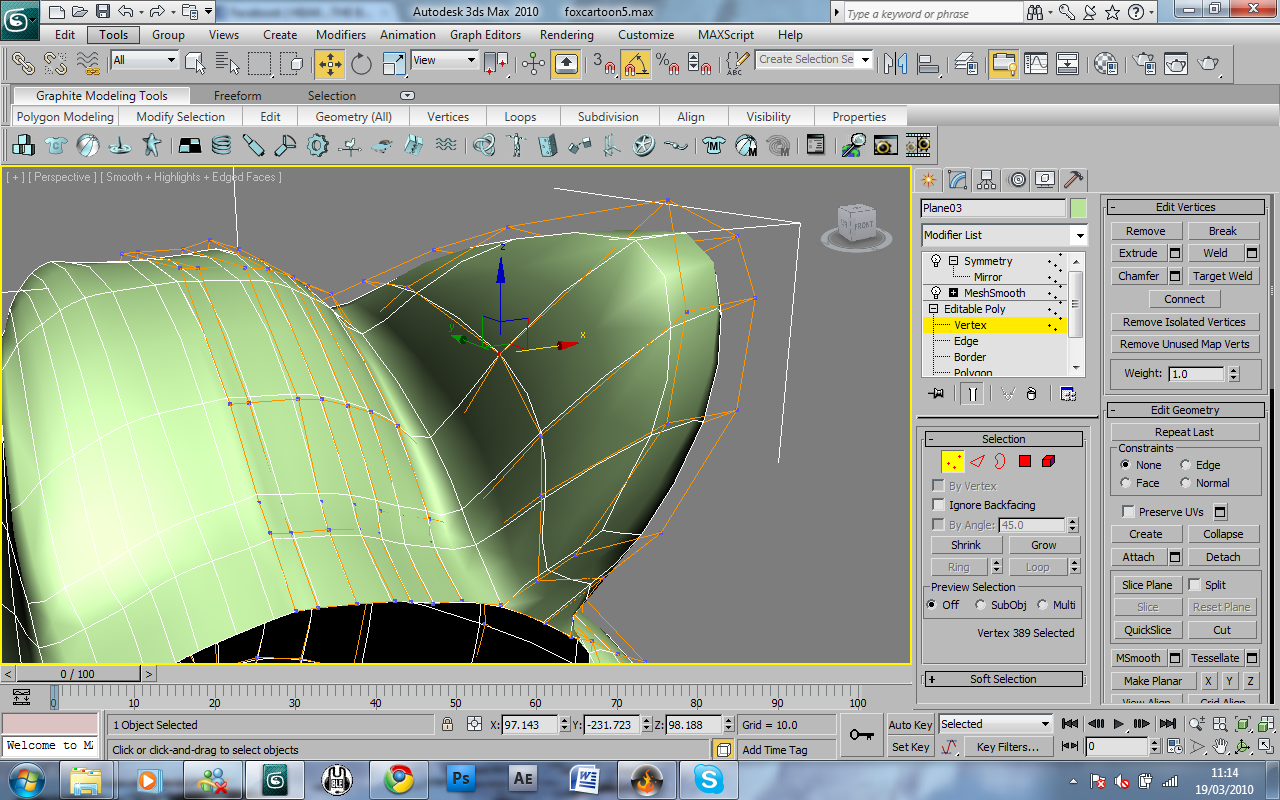
 There where alot of gaps after the extruded, so i target welded the vertex's to close the holes.
 To finish of the face of the model, the nose was filled in by creating new polygons.