After my previous attempt at creating a fox, I decided to add a bit more detail into a new one. I wanted to make the fox more cartoon like so I found a picture on google images and used it for guidance to help me in creating the head of the fox.
 I started the fox by creating a basic outline for the eyes and nose of the fox, using the guidance image for shape. In perspective view I brought out some of the edges to take it from being flat, and start making the 3D shape of the foxes head.
 Once the front of the fox head was modelled I began work on the fox's fur coming out the sides of the fox head. Using perspective mode I gave the fur a rounded shape. Once the back fur was complete, i created the lower mouth following the guide image for shape and size.
 Once the left view port shape had been made, I used the perspective view port to shape the lower mouth making the mouth more round and sealing up the end of the lower mouth. Using the upper mouth as a guide I was able to get the size I wanted for the lower mouth.
Once I had completed the mouth I began work of making the side and top of the fox's head, still using the shift move short-cut to clone edges.

 Moving down the back of the head, the fox fur that is on the side of the fox head joins up with the polygons on the back of the head, still making sure the shape matches up with the guidance image.
 I was very please at this point how well the head had formed, and at how well the polygons joined with those on the fur at the sides, this gave a great shape to start the body one.
 Before starting the body the ears needed to be created. This was done by extruding out the polygons that had been set up for where the ear will be and maving the vertex's to give the ear shape and depth.
 The fox ear came together perfectly, it took same time to move to vertex's to get the shape that was wanted but the end result of the ear was better than I had expected.
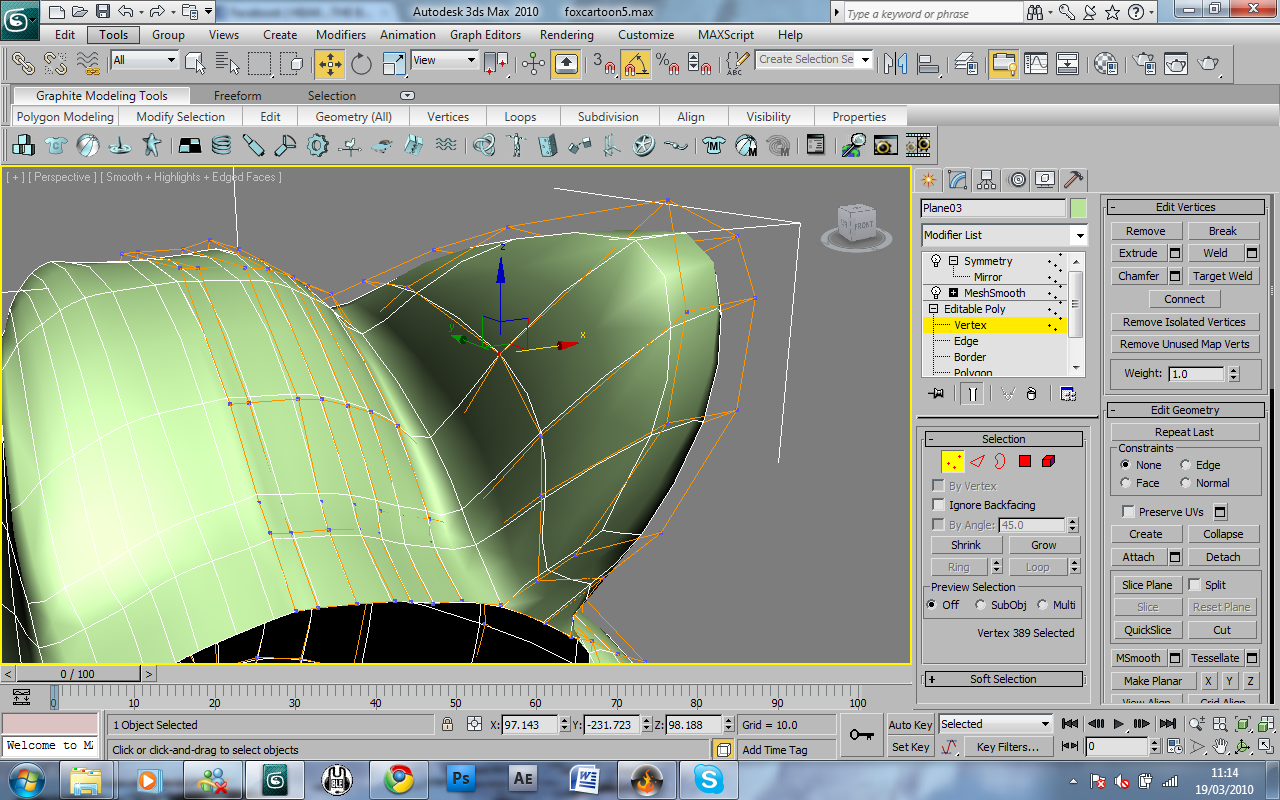 When i applied a mesh smooth the where some rough vertex's behind the ear that made the ear go out of shape. This was quickly resolved by moving the vertex's at the back of the ear more towards the middle so the inner ear and the outer ear where not as close to each other.
 Once the head was completed, it was time to create the body. Using the shift drag method I created the back of the fox to the desired length. I looked at multiple images for foxes to get size proportions for the length.
 Using the top view port I used the scale tool to shape the back to be more like the back of a fox.
Once the top of the bad was created and shaped I moved to creating the body again using multiple images to give a good size for the body of the fox. Was very pleased at this point at how well my fox was beginning to form.
 To get the front leg started I extruded out the side of the body of the fox to create the shoulders for my fox. Shaping the bottom of the shoulder to the width of the upper part of the front leg ready to be extruded.
 After the body had be moulded the tail needed to be created, I first created the basic shape that the tail would be made from, by using the scale tool, and the move tool for positioning.
 The tails was then dragged out, and given shape by using the scale tool, I looked at images over google to help with the proportion of the tail too, but most of them where different, so i hmade a choice on the size i thought looked best on it.
 After the tail was complete it was time to extrude the legs down, i extruded down the top of the leg, and gave it shape.
 I then extruded down the polygons for the rest of the leg.
 Looking at images for reference i shaped the legs for the fox to match what i had found, using the scale tool.
 It then came time to work on the back legs like i did with the front legs i extruded the upper leg down, and shaped it to match what i had found in images.
 I then extruded the rest of the upper leg and moved it into shape, ready for the lower back leg to be extruded down.
 I the extruded down the lower leg and used the moment and scale tools to shape the leg, to match a fox's lower leg more.
 Once this was completed the modelling of the fox was completed. I broke the model up into 3 parts, head, body, tail to be unwrapped individually.
 Once the unwrap was completed the textures where edited using photoshop, and applied to the model, symmetry was added to each object and a mesh smooth. The eyes where then added into the sockets.
No comments:
Post a Comment